VariPOS Documentation
Read module-by-module like an operations story. Every scene tells what to do, what to check, and what outcome to expect.
Read module-by-module like an operations story. Every scene tells what to do, what to check, and what outcome to expect.
Stock comes in from suppliers and inward operations are recorded with proper due tracking.
By tapping on the Purchase Entry menu item or Puchases card on the dashboard, opens up the Purchases screen. A purchase entry is used to track the purchase made by the seller from the suppliers based the invoices issued by suppliers, so they are basically Goods Receipt Notes (GRN).
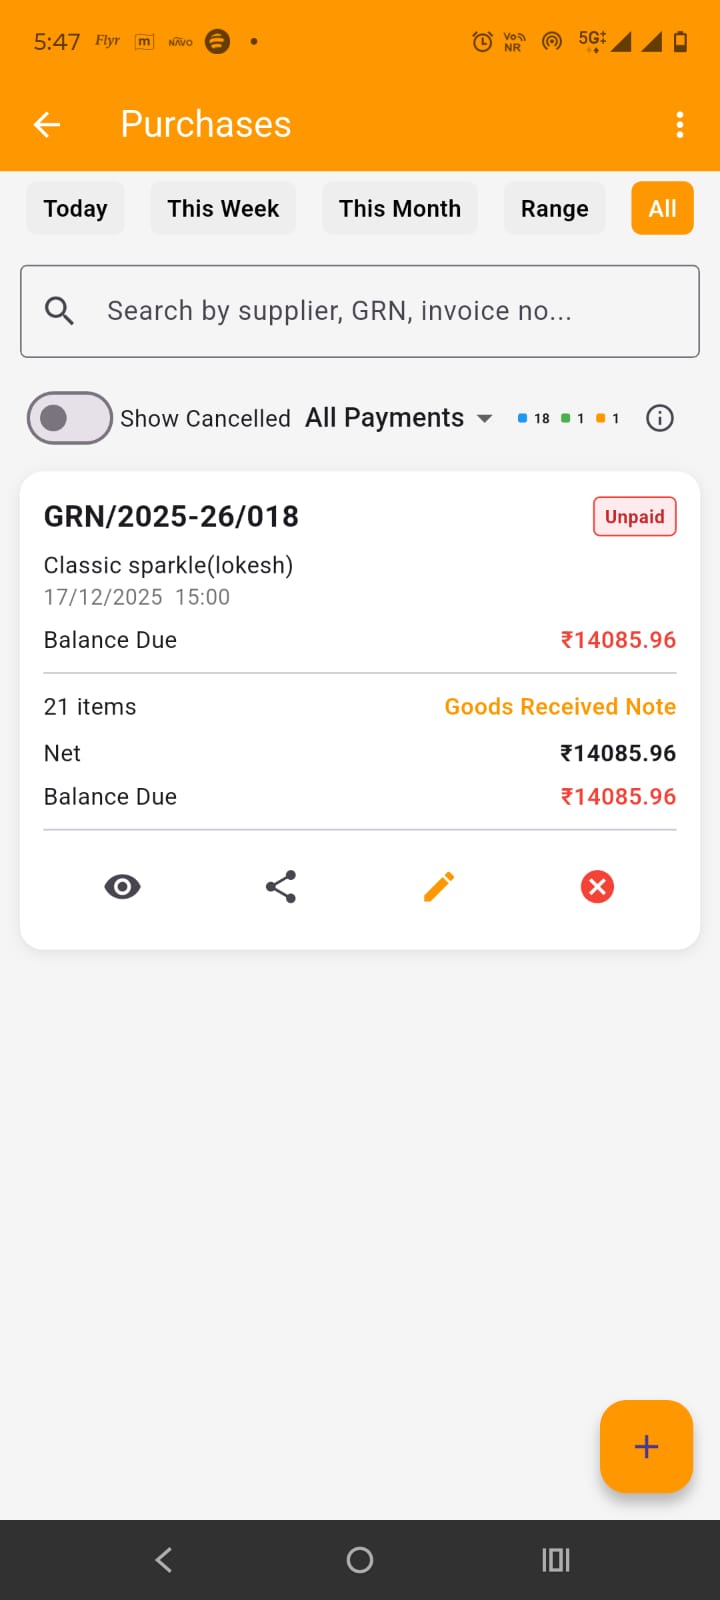
Here, on this screen, you have the list of all GRNs that you created. By default, only today's GRNs are shown but you can filter them by This week, this month, date range or view them all. At the top in the app bar, by tapping the three dots at the right side, you get the options to Download Excel, Share Pdf or print preview the list of GRNs shown in the screen (with the filters applied).
Below date filters, you have the search field which can be used to search GRNs by supplier name, GRN number, amount etc. Below that you get the drop down to filter by payment status and show/hide cancelled GRNs. Below that you also have the GRN count stats.
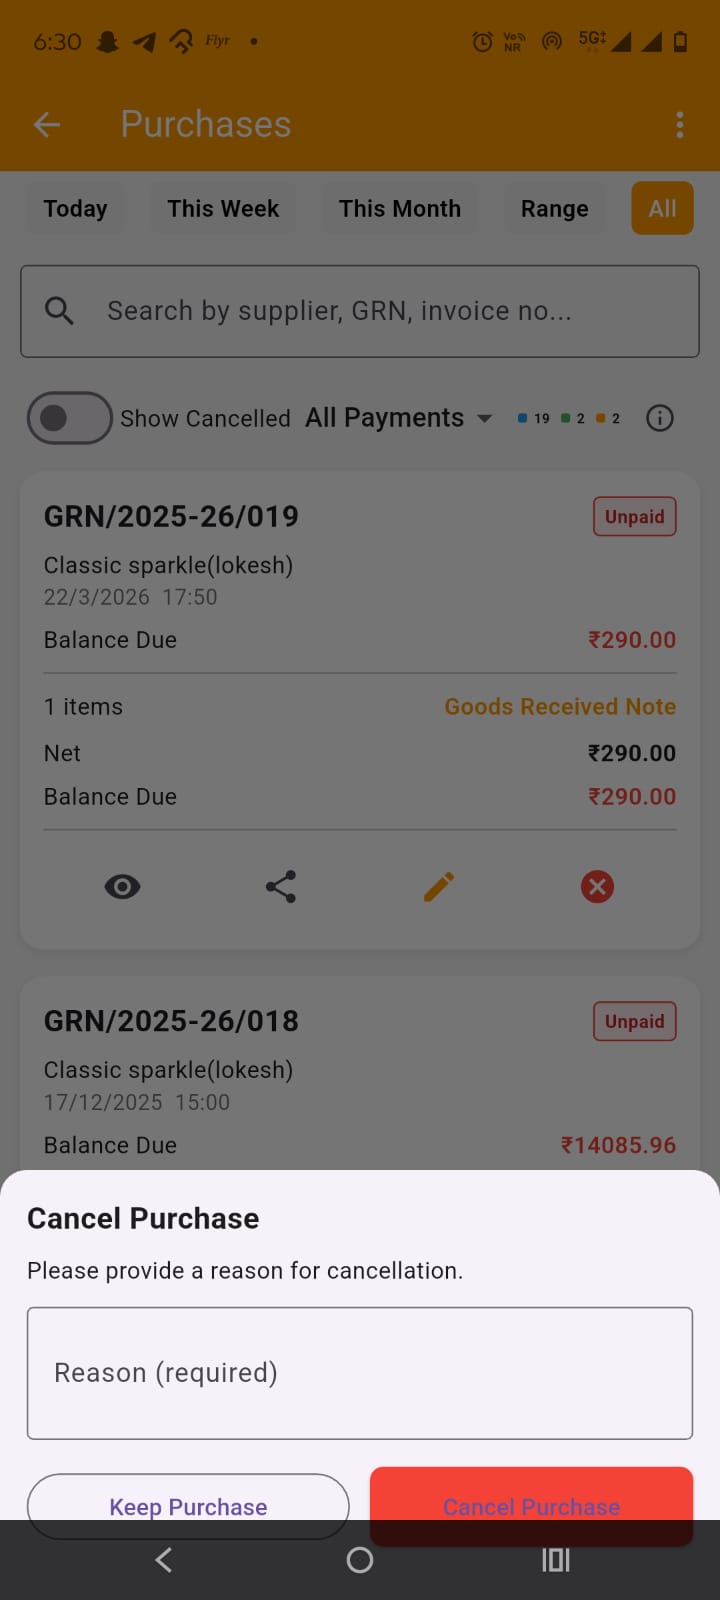
In the GRN card, important details of the GRN are shown. At the bottom of each card, you get the options to view GRN details, share invoice, edit the GRN and cancel the GRN. Please do note that once a GRN is created it can not be ammended, when you edit a GRN, you are actually cancelling the old GRN and creating a new one. When you cancel a GRN, you have to provide the reason for it as shown in the image
At the bottom, you have + (Plus) FAB button, which is used to open Add (same as Edit) GRN screen.
By tapping on thw + (plus) FAB button on the purchases screen or tapping edit on the purchase (GRN) card on the purchases screen, opens up the Add/edit purchase screen. Do note the purchase (GRN) is used to stock in the products (Goods only as service do not have stock) i.e. to increase the stock qty of goods and used for calculations of profit and loss (pnl).
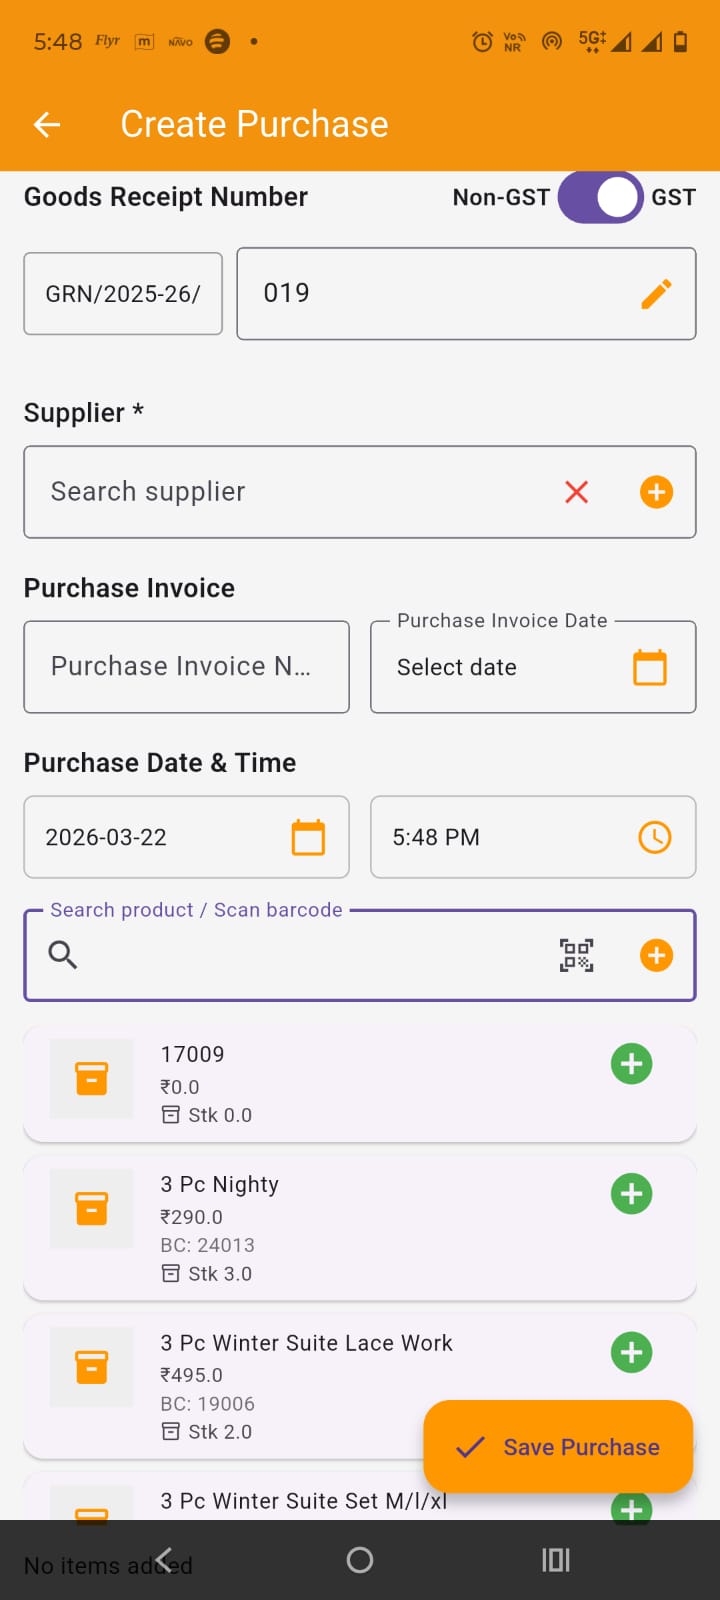
For adding or editing purchases on the screen, you have to keep in mind that wether you are a gst registered (regular) seller or not, but you can receive gst invoices from sellers but only things differs is your capability to claim ITC (and hence pnl calculations which is automated). However you can receive both gst or non gst bill from the supplier. Select if the GRN is GST on non GST. If required, change GRN number but it must be unique if you are changing it. :
Select supplier. If customer is not listed, you can add it from here itself. Set purchase invoice number and date. Also select the purchase date and time. These dates can not be in future or in past FY.
Below this in the search field you can search the product or service by name, barcode, sku etc or you can simply scan the barcode. you get a list of filtered products from which you can select the item to add to GRN. You can also add the product using + icon given alongwith the field. On selecting the item, it is added to GRN as shown in the image . you can edit its item level discount, price, tax , gst inclusiveness/exclusiveness , qty and remove it from the GRN. you also get its pricing breakdown details.

You can add as many items you want to GRN. In purchase item card, by tapping on the change Item discount, the modal appears, where you can set the item discount either by percentage wise or flat amount wise but only one. Percent value overrides the flat amount. The discount can not be more the item price itself.

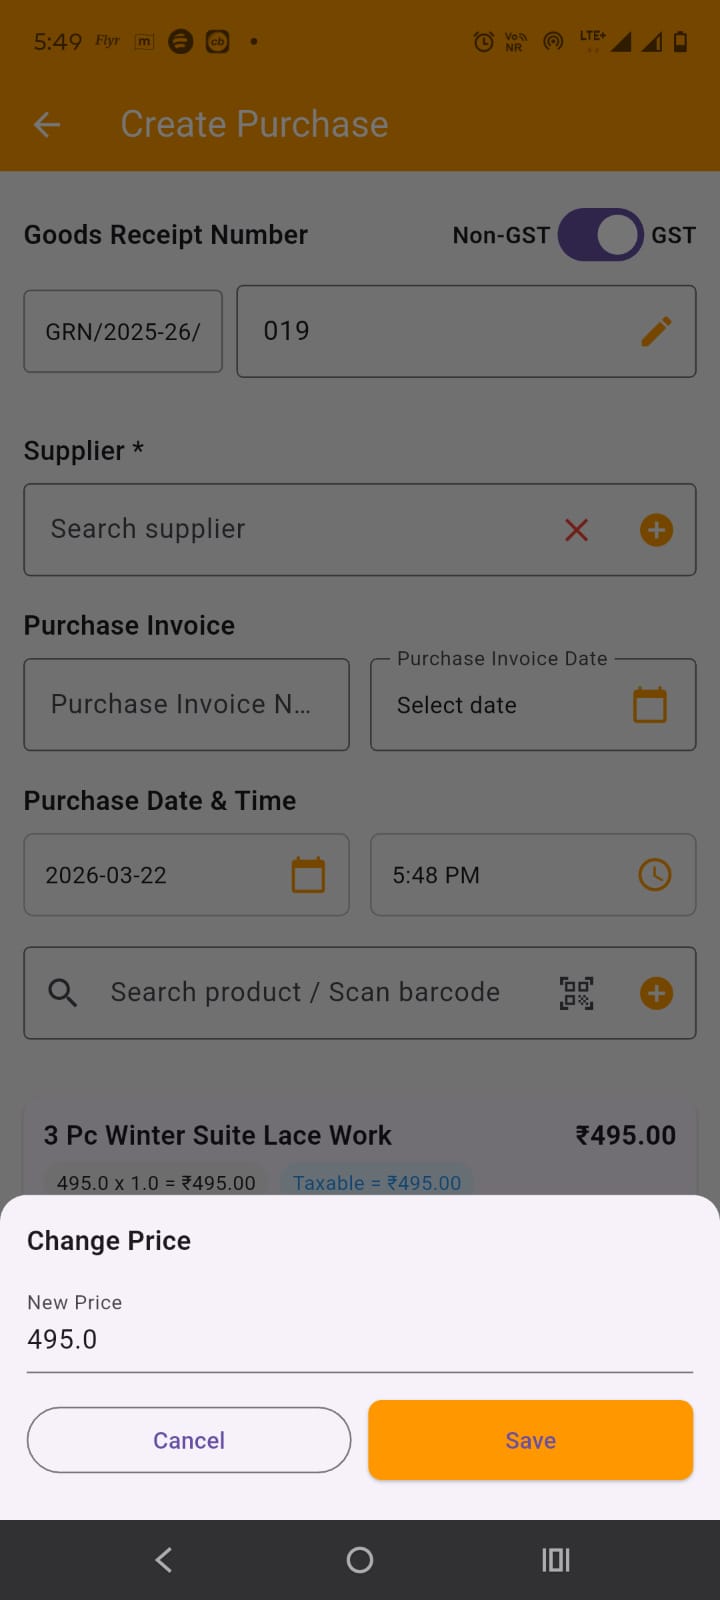
In purchase item card, by tapping the price change icon, a model pops up where you can change item price
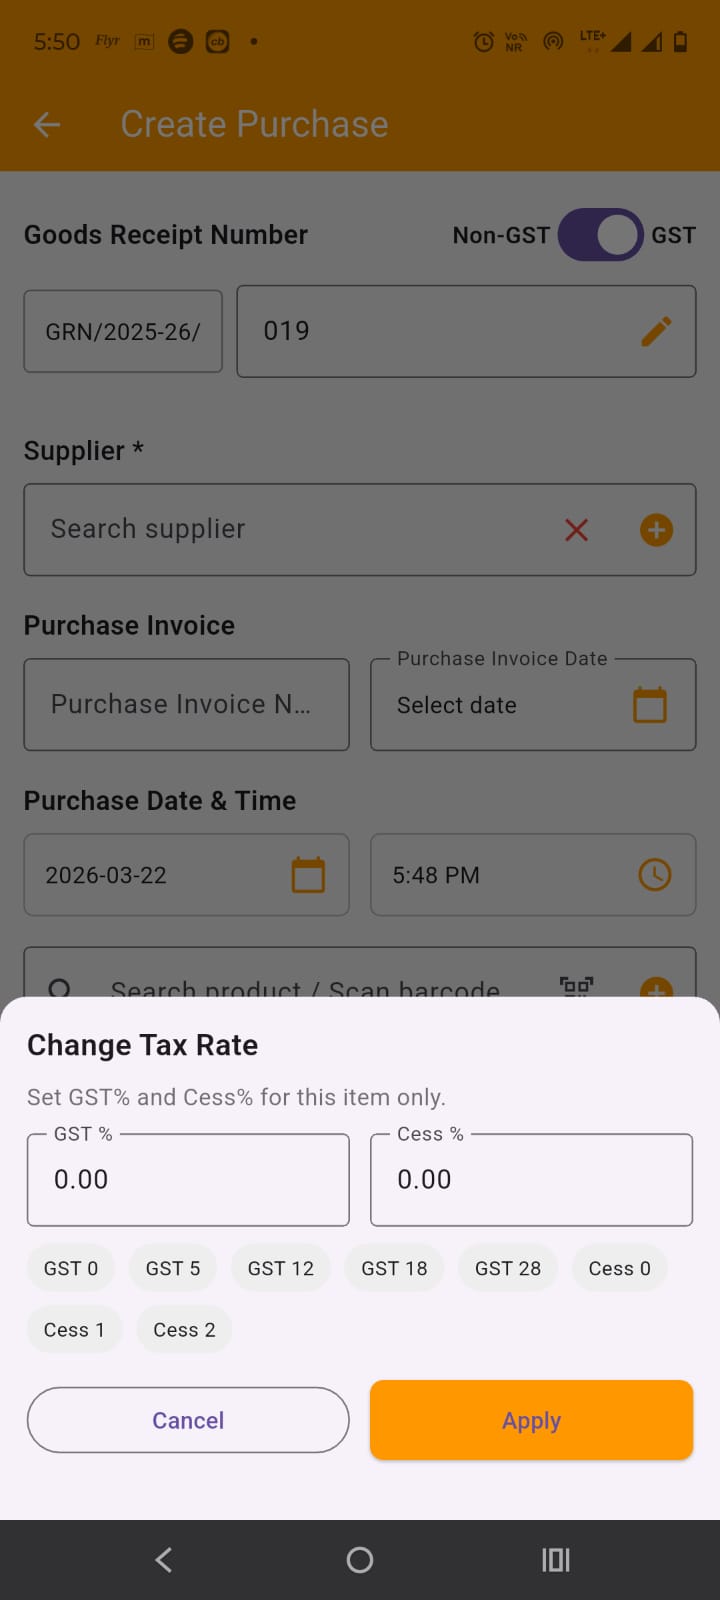
By tapping on the GST rate change icon on the item card, a modal appears, where you can change the gst and cess rate of the item.
You can set the purchase level discount either by percent or flat amount. The discount is proprotionally distributed among items for pricing break downs. Below this you all the total information is displayed. Below that you can enter the payment paid amount and mode. It will create entry in the payments and supplier ledger and if partial or no payment is made, if will shown outstanding in the dashboard, supplier ledger and in payments screens where you can add payment manually later on to clear outstanding.
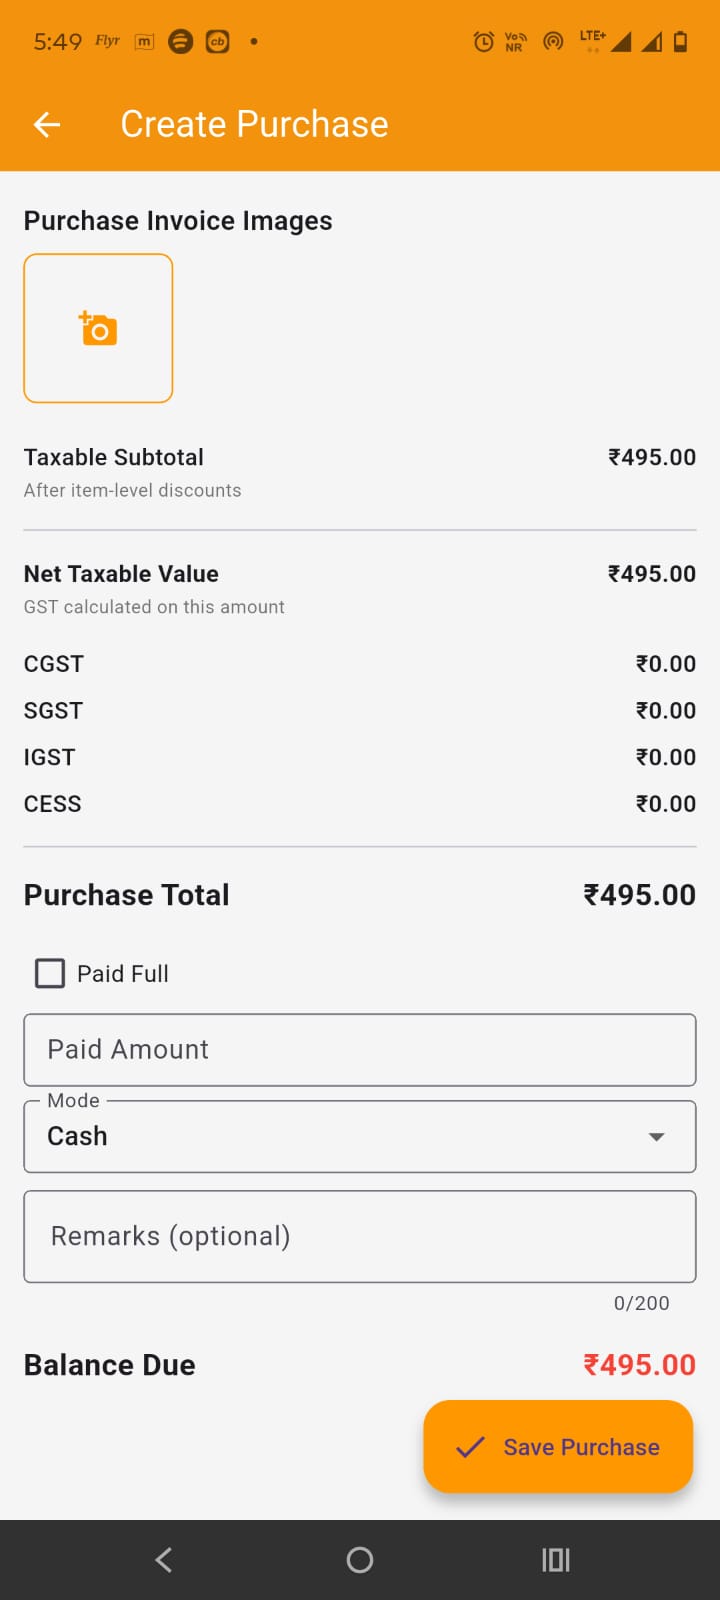
On tapping the save invoice FAB button saves the purchase (GRN).
By tapping on the purchase (GRN) card in the purchases screen, opens up the GRN (purchase) details screen.
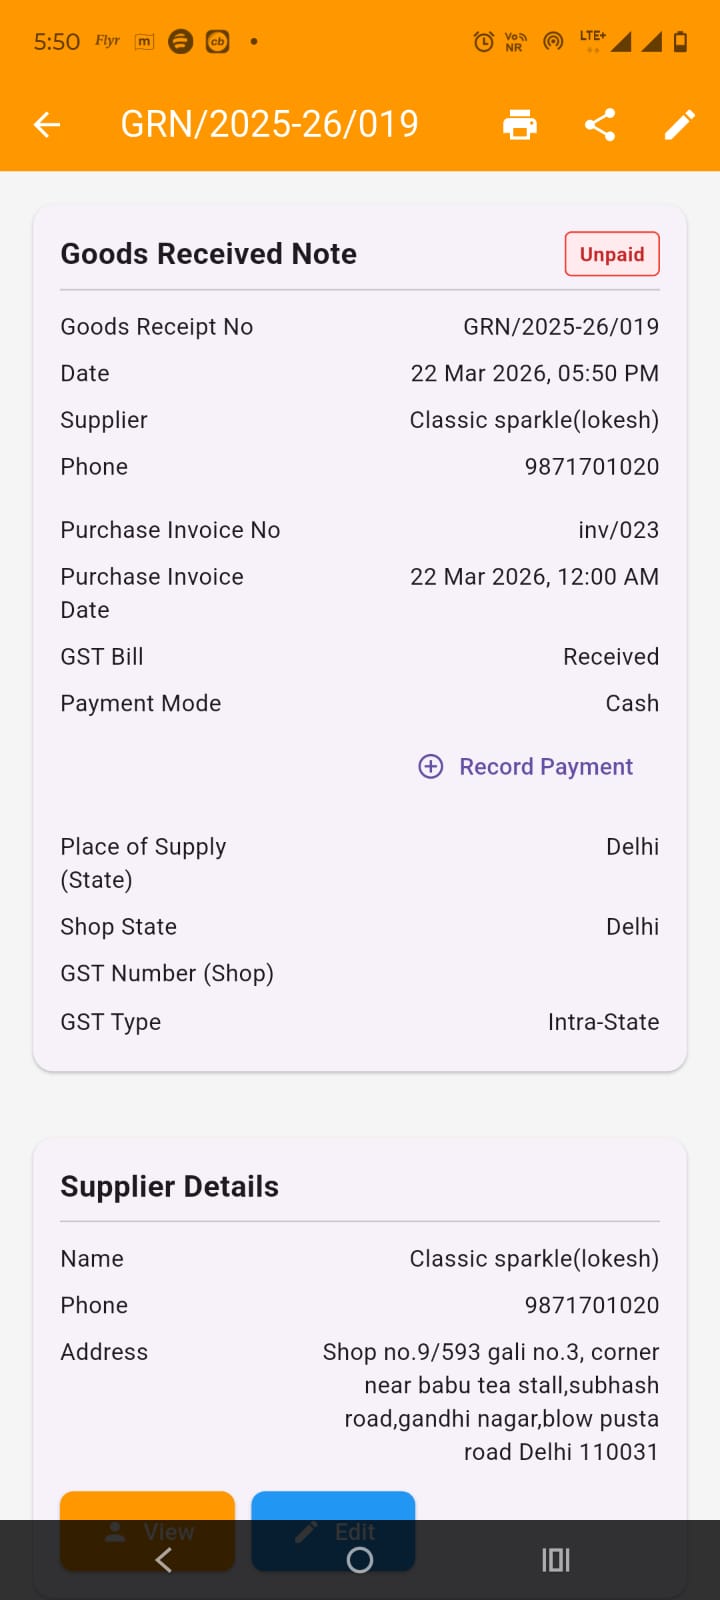
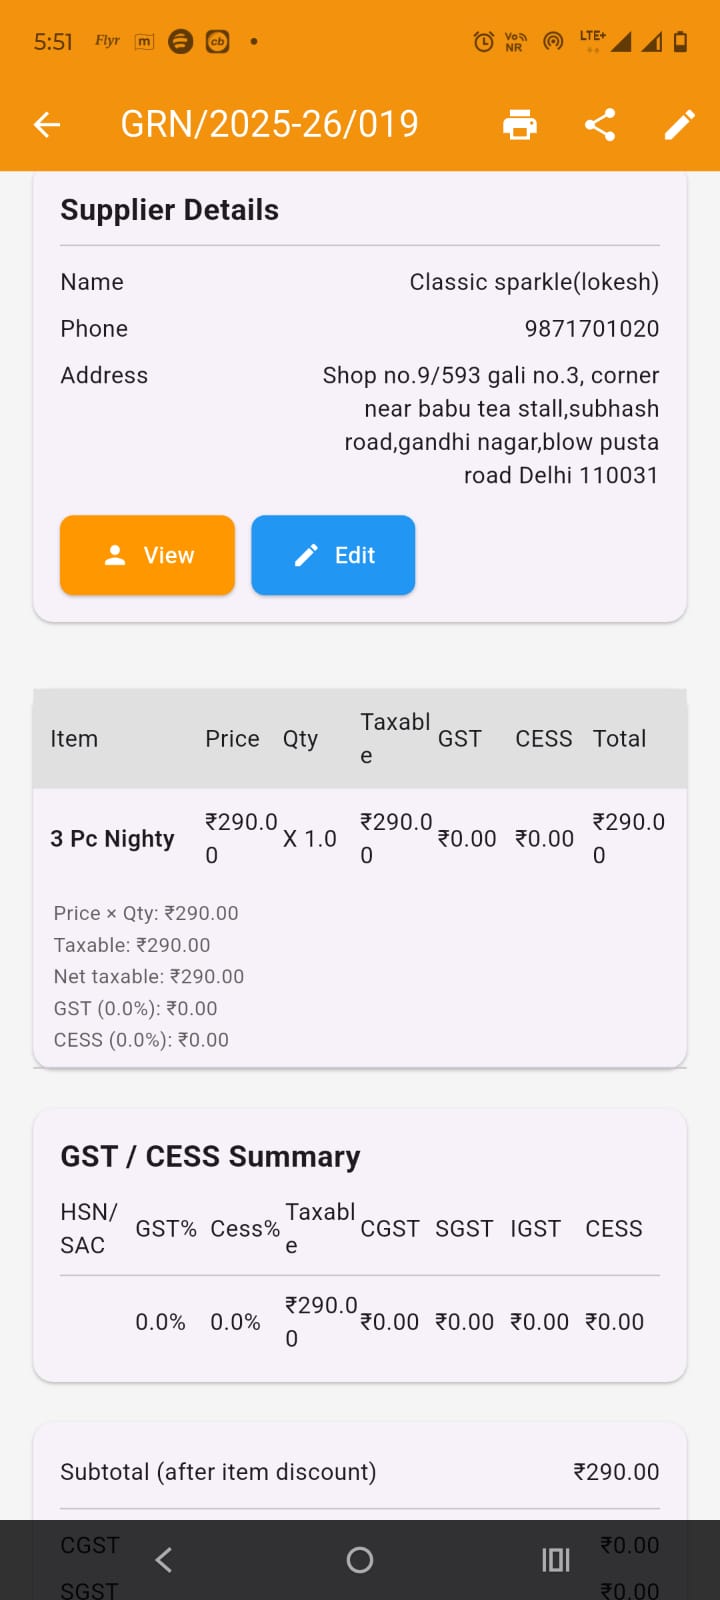
Here you can view all the purchase (GRN) details, items pricing breakdown, totals breakdown..
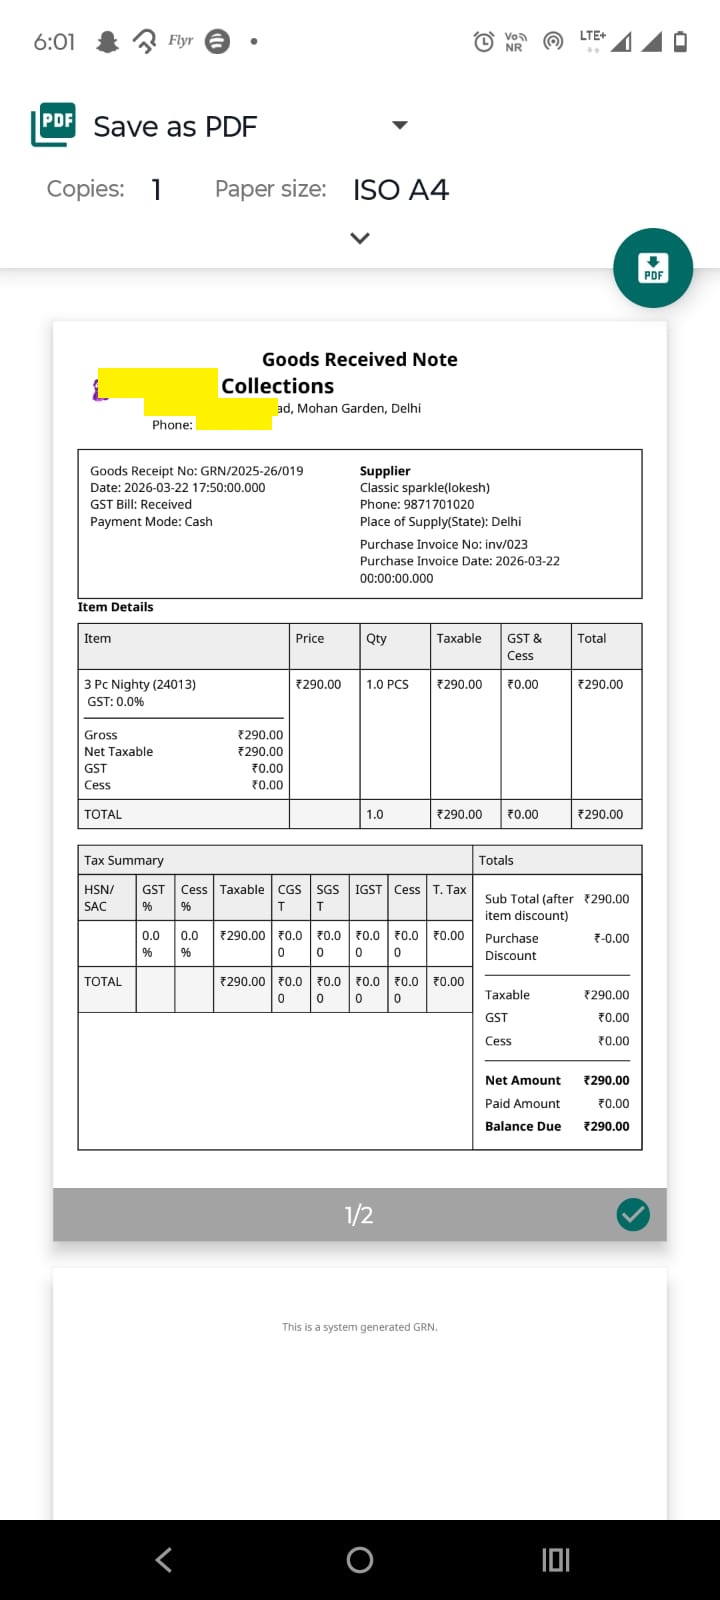
In the app bar you get the options to print the GRN and share the pdf of the GRN as shown in the images.
You also get the option to edit the GRN (please do note the editing will cancel current and create new GRN if updated).