VariPOS Documentation
Read module-by-module like an operations story. Every scene tells what to do, what to check, and what outcome to expect.
Read module-by-module like an operations story. Every scene tells what to do, what to check, and what outcome to expect.
Use the product and categories page/screen to create, update the products/services and their categories. You can also import and export products and edit products by scanning product barcode.
You can open products screen by tapping on the Products menu item or from dashboard.
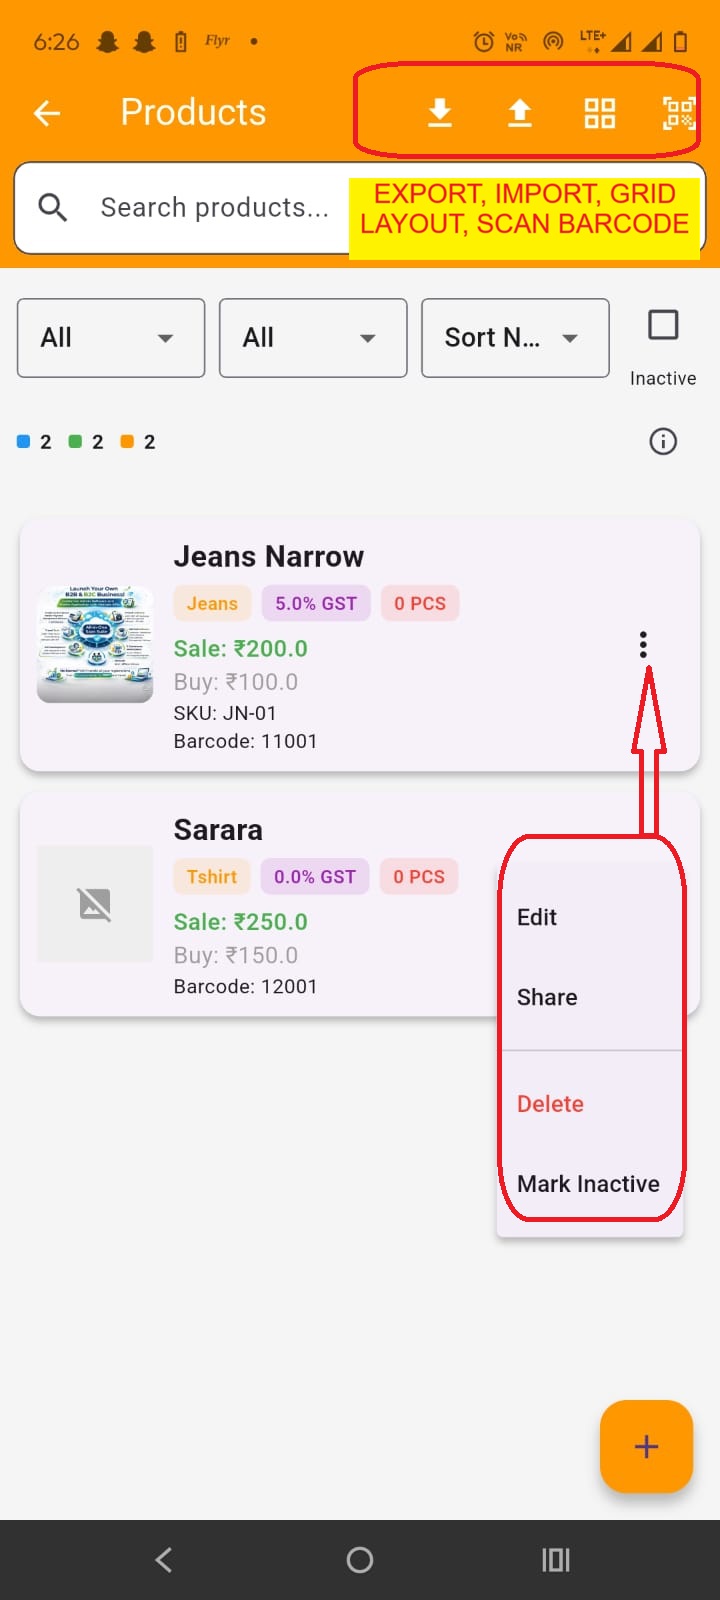
On this screen at the top you have options to export, import products data through excel file, you can change layout as grid/details view and filter products by scanning barcode. Below this, you can filter the products by categories, product/service type and product active/inactive type. you can sort products by name, price, stock.
By tapping anywhere on the product card, you can open the product detail screen. By tapping on the three dots in the products card, you open a menu, using which you can Edit, Share, Delete and Mark product active/inactive.
You can add product by clicking on the + (Plus) FAB button at the bottom right of the screen.
By tapping on the Add (+) button or Edit option, you open the product add/edit screen.
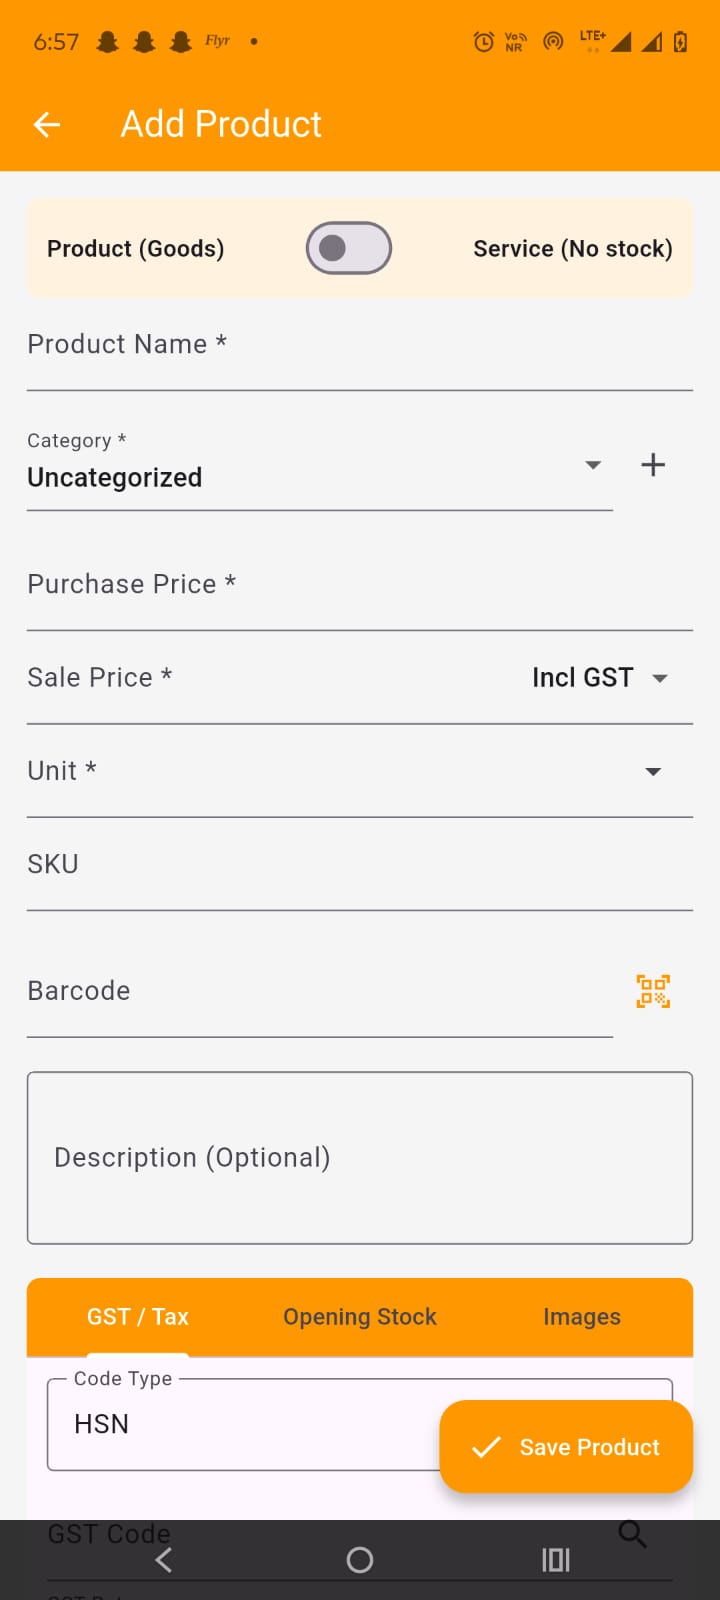
On product add/edit screen, select product (Goods) or Service (No stock) as per your requirement and :
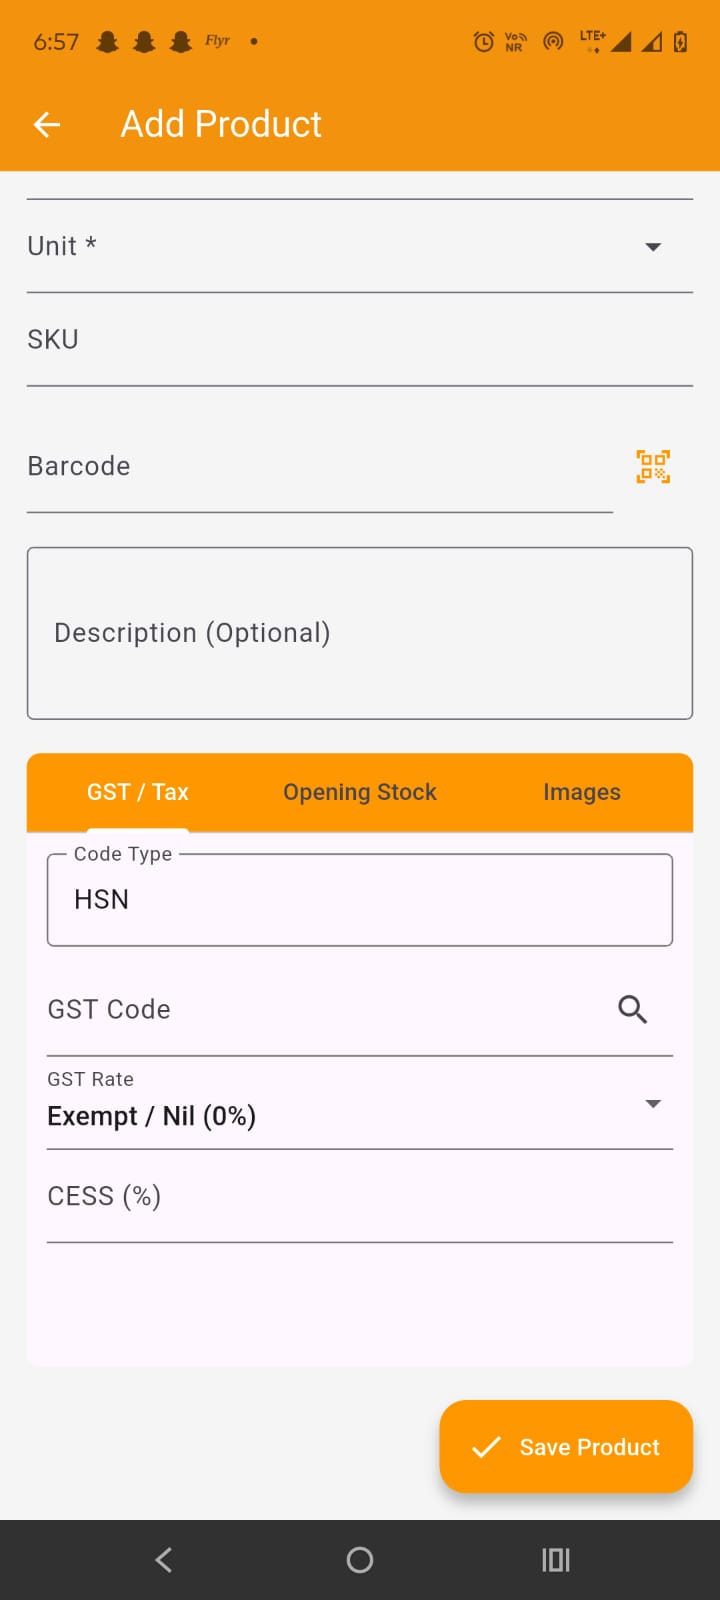
At the bottom, in GST/Tax under tab bar, enter GST code (HSN/SAC) and GST rate and cess % (if applicable).
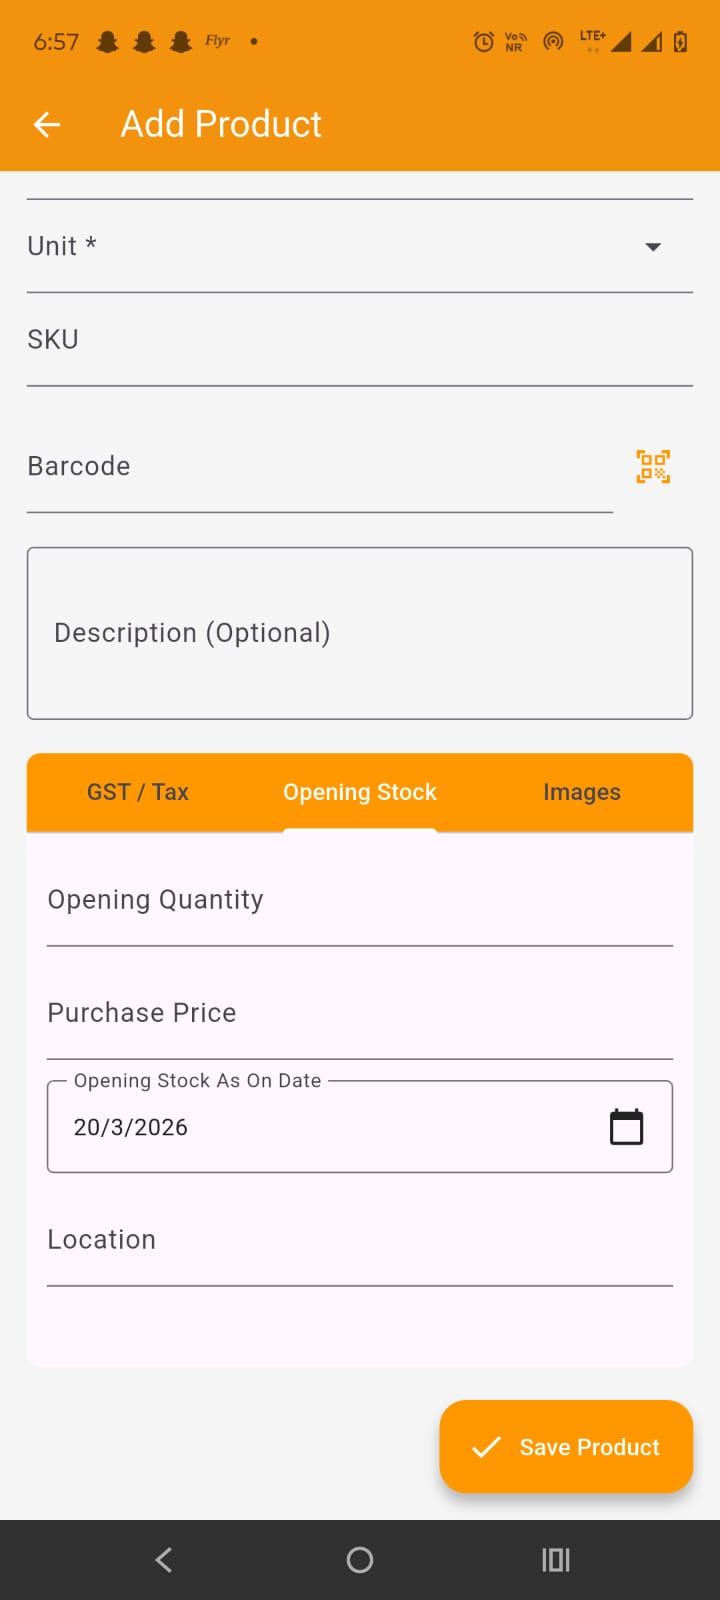
At the bottom, in Opening stock under tab bar, enter opening quantity (if any), purchase price (optional), opening stock as on date(optional). Try to use purchase order to add qty, however if opening stock is available, you can add it here.
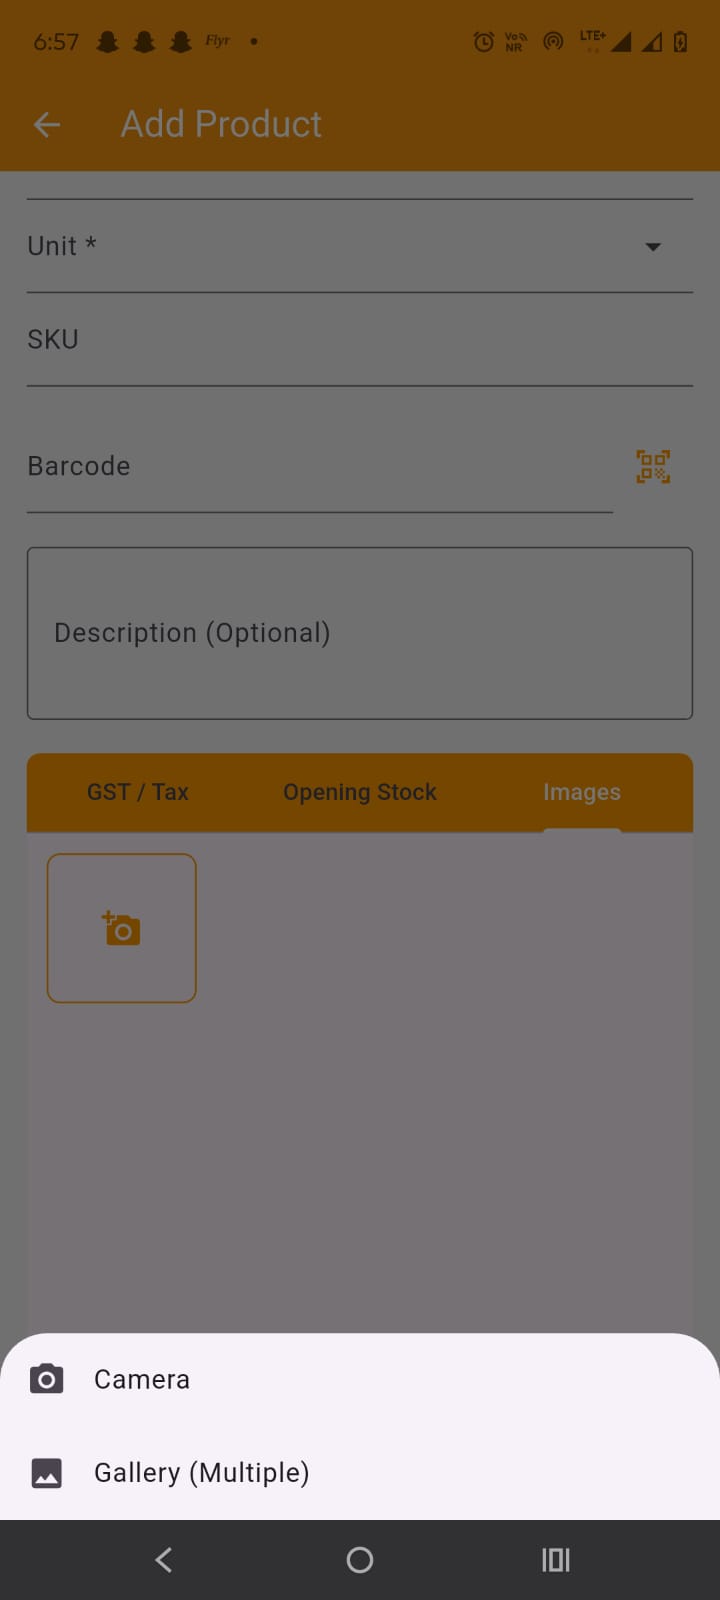
At the bottom, in Images tab under tab bar, select or capture the product images. It is recommeneded to have product images for easy identification and for sharing purposes.
By tapping on the product card in the products screen, product detail screen is opened.
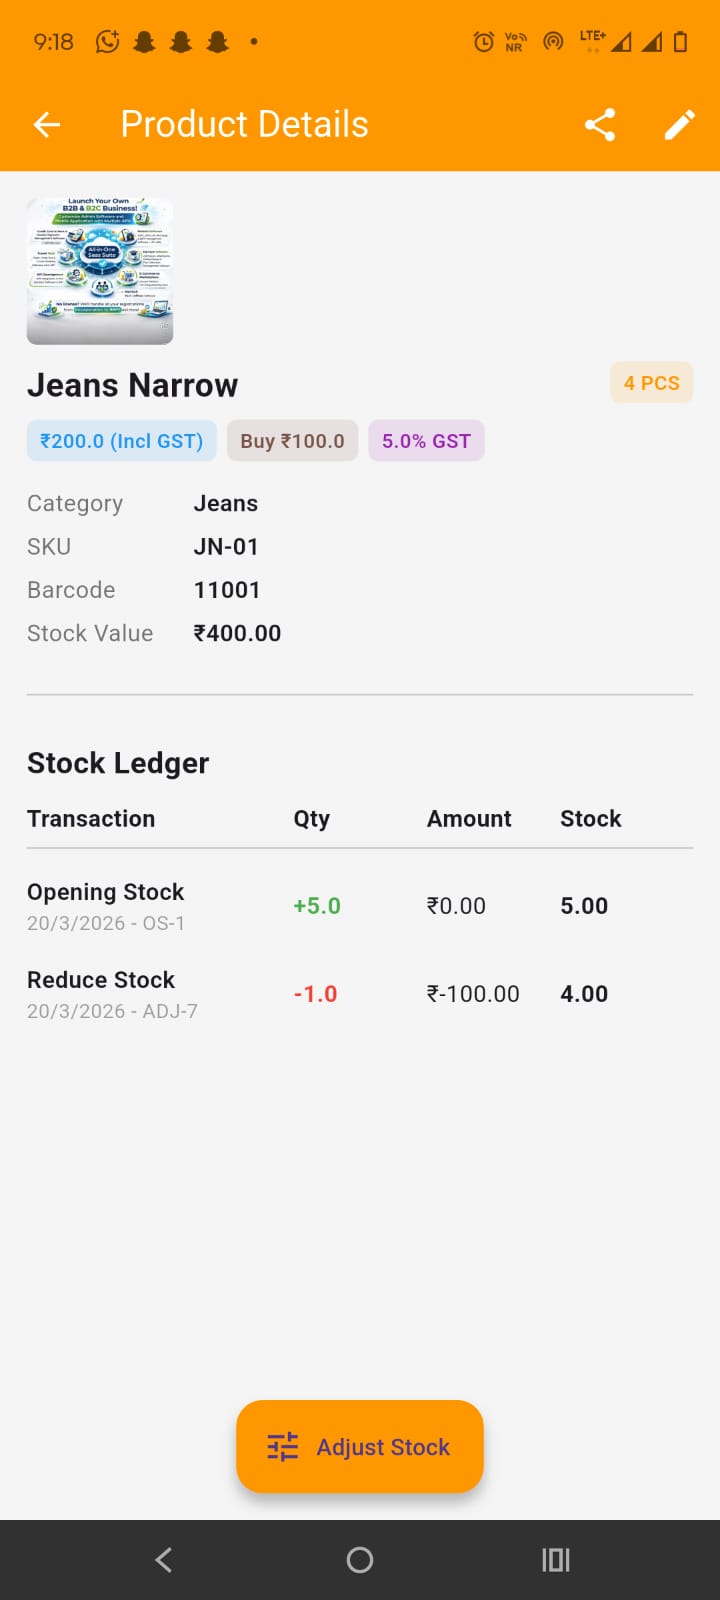
Here you can view all the product/service details. For services, stock adjustments and opening stock is not applicable as services do not have stock and quantity. At the center bottom, you have Adjust stock button which opens up the stock adjustment screen. Below product basic details, you have Stock ledger (For Goods only) which you see all stock transactions like Opening Stock, Add Stock Adjustment, Reduce Stock Adjustment, Sale, Sales return, Purchase and Purchase Returns. By tapping on any row it opens up its editing screen (other than opening stock).
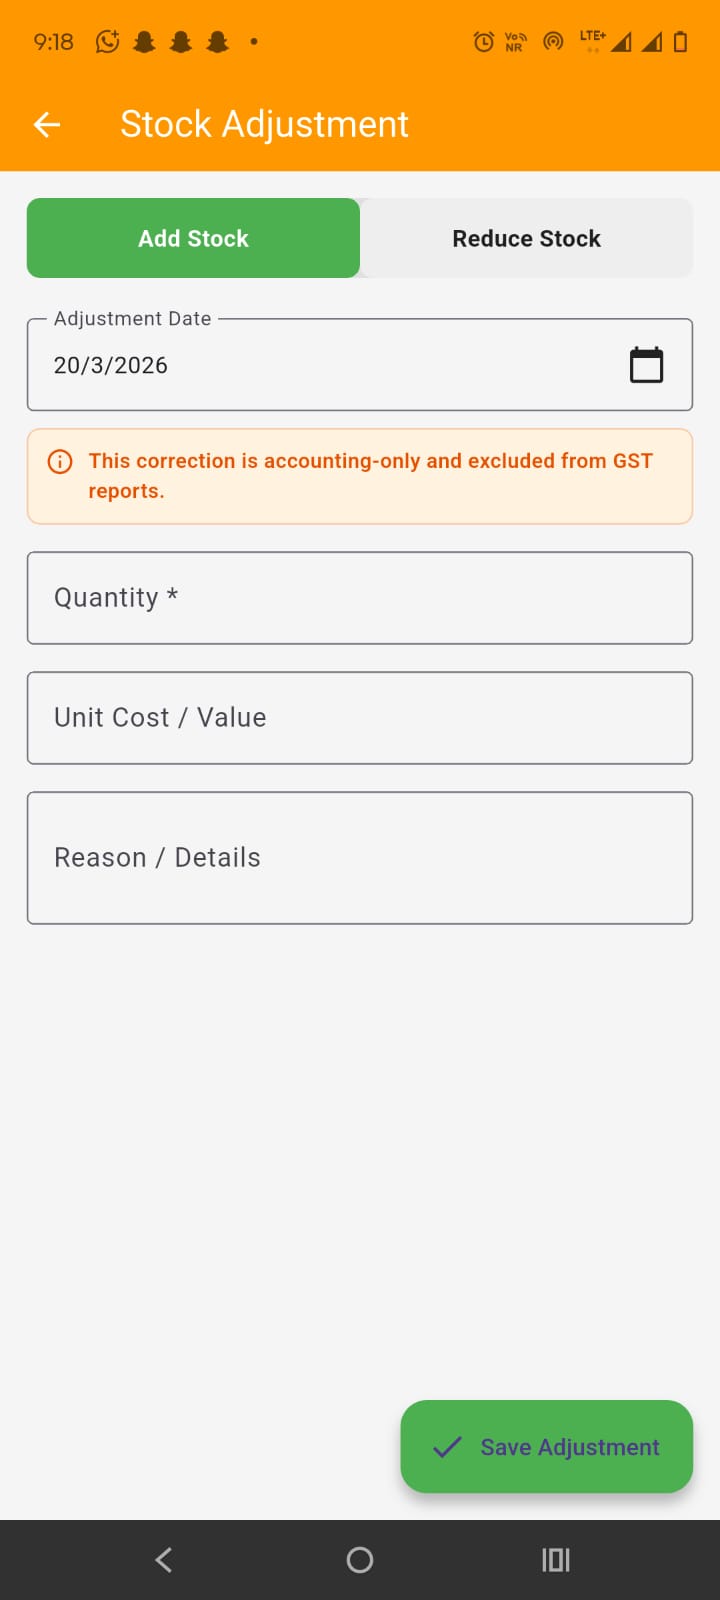
By clicking on the Adjust Stock button at the bottom of the product details screen, Stock Adjustment screen is opened. The stock adjustment is for adding stock which is received like for free but have value in itself and for reducing stock for reasons like stock damaged by rat bite etc. So adding stock adjustment is like profit thing and reducing stock adjustment if kind of loss thing. In either case add adjustment date, quanity, Unit cost per (optional but recommended) and reason (optional but recommended)
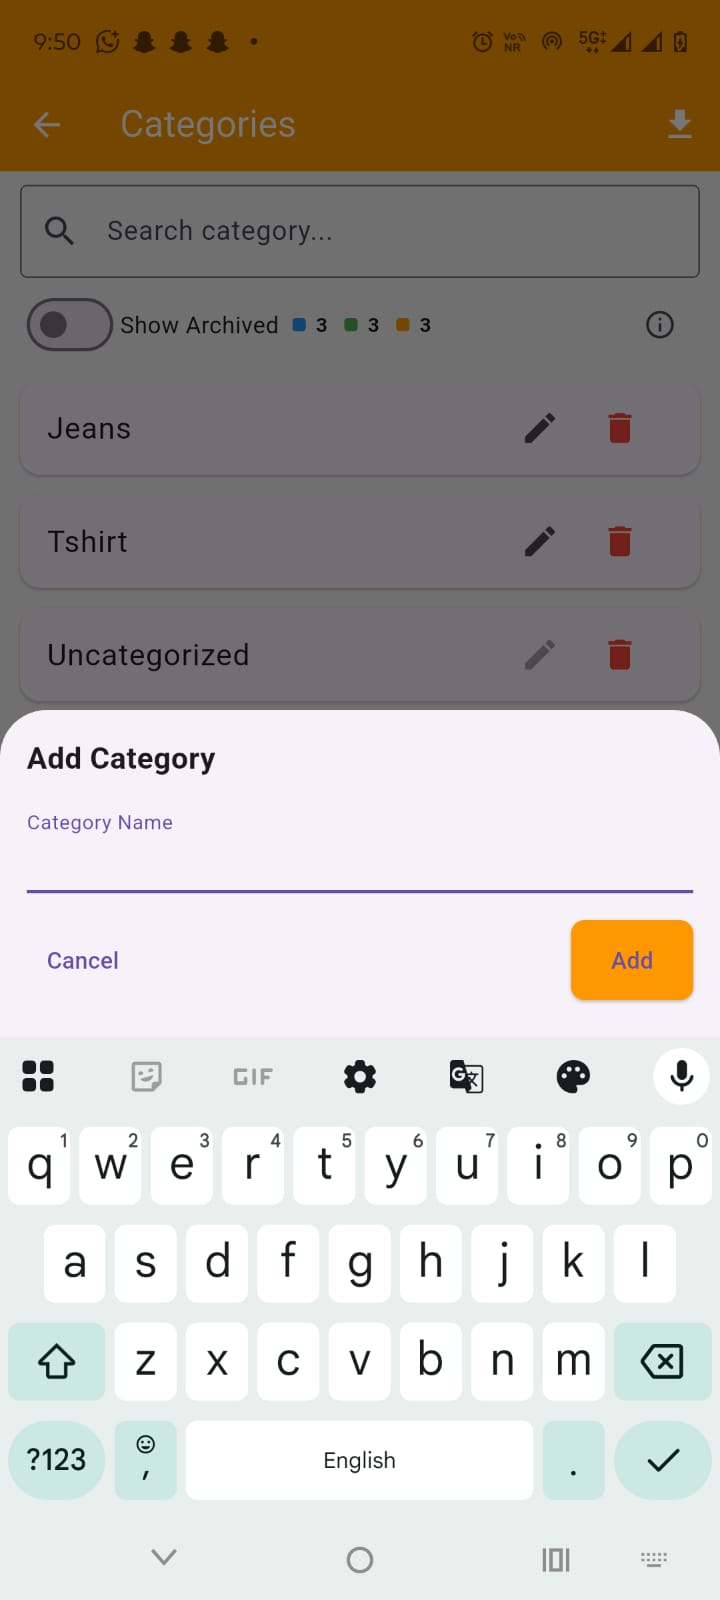
By tapping on the Categories menu item, Categories screen appears. Use the Categories for assigning category to product/service. Each product/service can belong to just one category in the app.
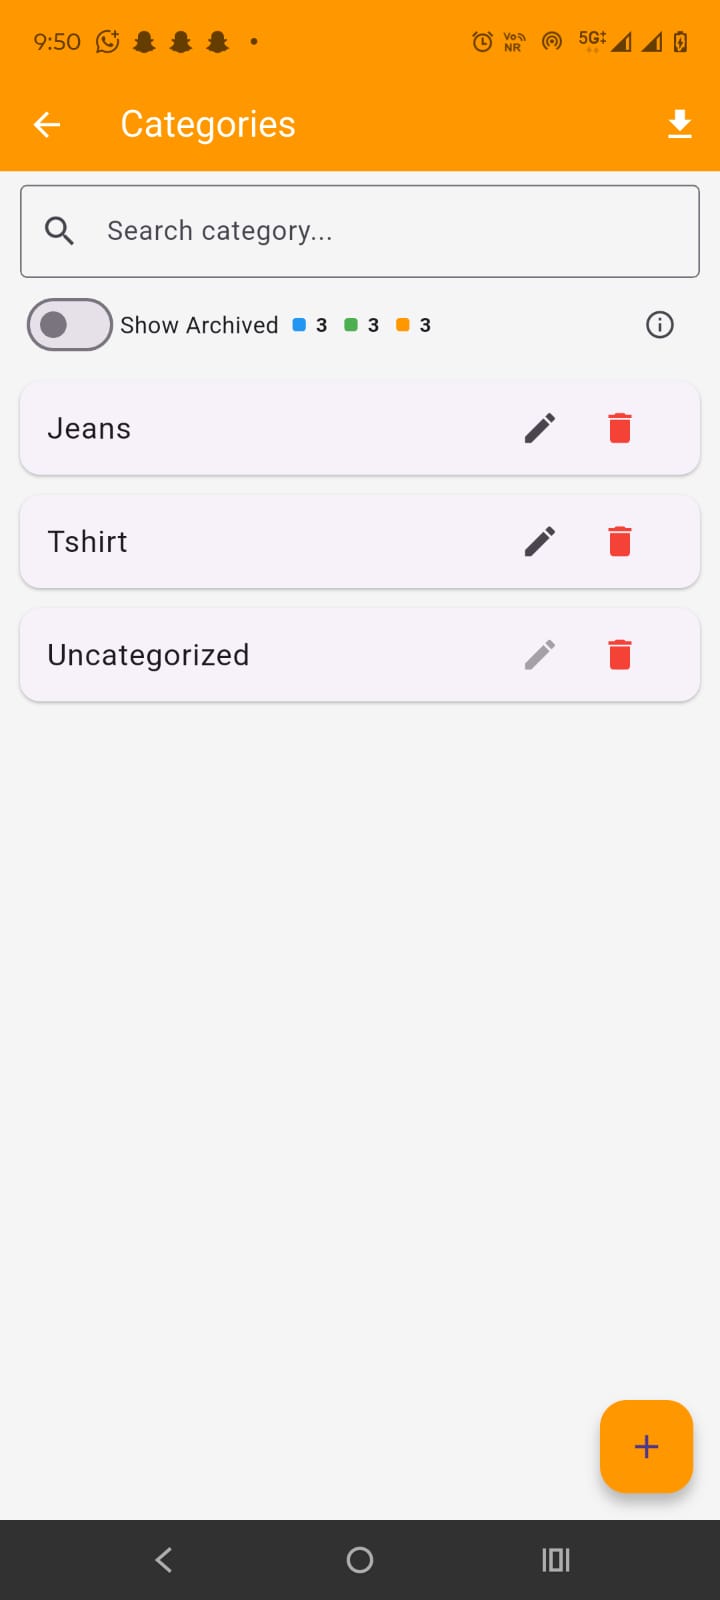
Here on this screen, all the categories all displayed. we can search catgories and edit or delete (i.e Archieve) categories. We can download or export categories data by clicking on the respective icon at the right side of app bar.
By clicking on the + (plus) icon, Add category bottom sheet modal is opened up. here enter the new category name and tap add to add new categoy