VariPOS Documentation
Read module-by-module like an operations story. Every scene tells what to do, what to check, and what outcome to expect.
Read module-by-module like an operations story. Every scene tells what to do, what to check, and what outcome to expect.
Year-end control: one period closes cleanly and the next opens without confusion.
Open Settings and tap Financial Years. This screen is used to manage all financial years of the shop. A financial year controls date-based business data such as invoices, purchases, expenses, reports, GST working, and opening/closing balances. The app uses it to separate one business year from another.
The screen shows all created financial years in a list. Each row normally shows:
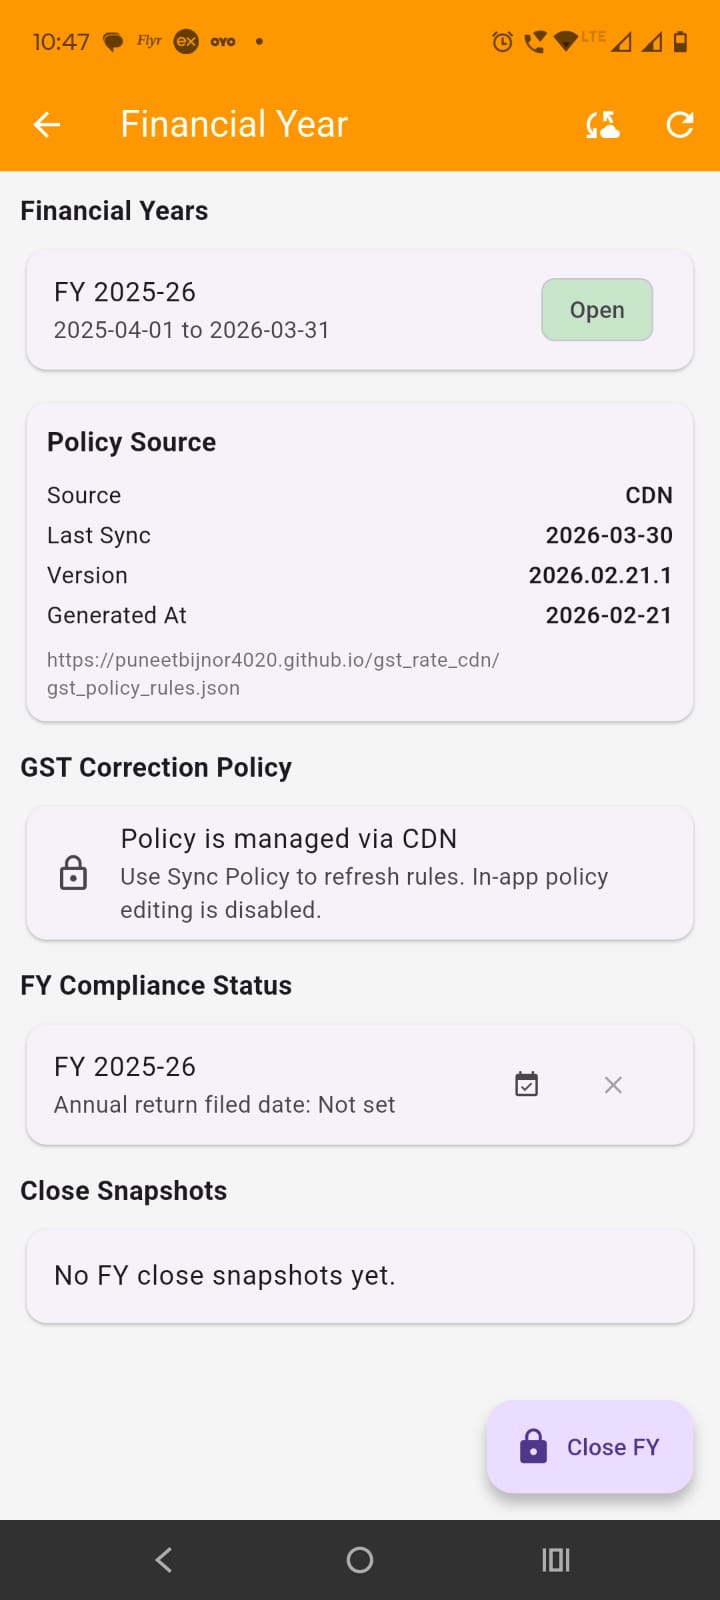
Identify the active year: The active financial year is the one currently used for new entries and reports unless another period is selected in a report screen. This screen is not for manually adding a new financial year. The app creates the next financial year automatically when the current financial year is closed.
The open financial year is the current working year used by the app for transactions and default report filters.
Use the Close FY button at the bottom right of the screen.
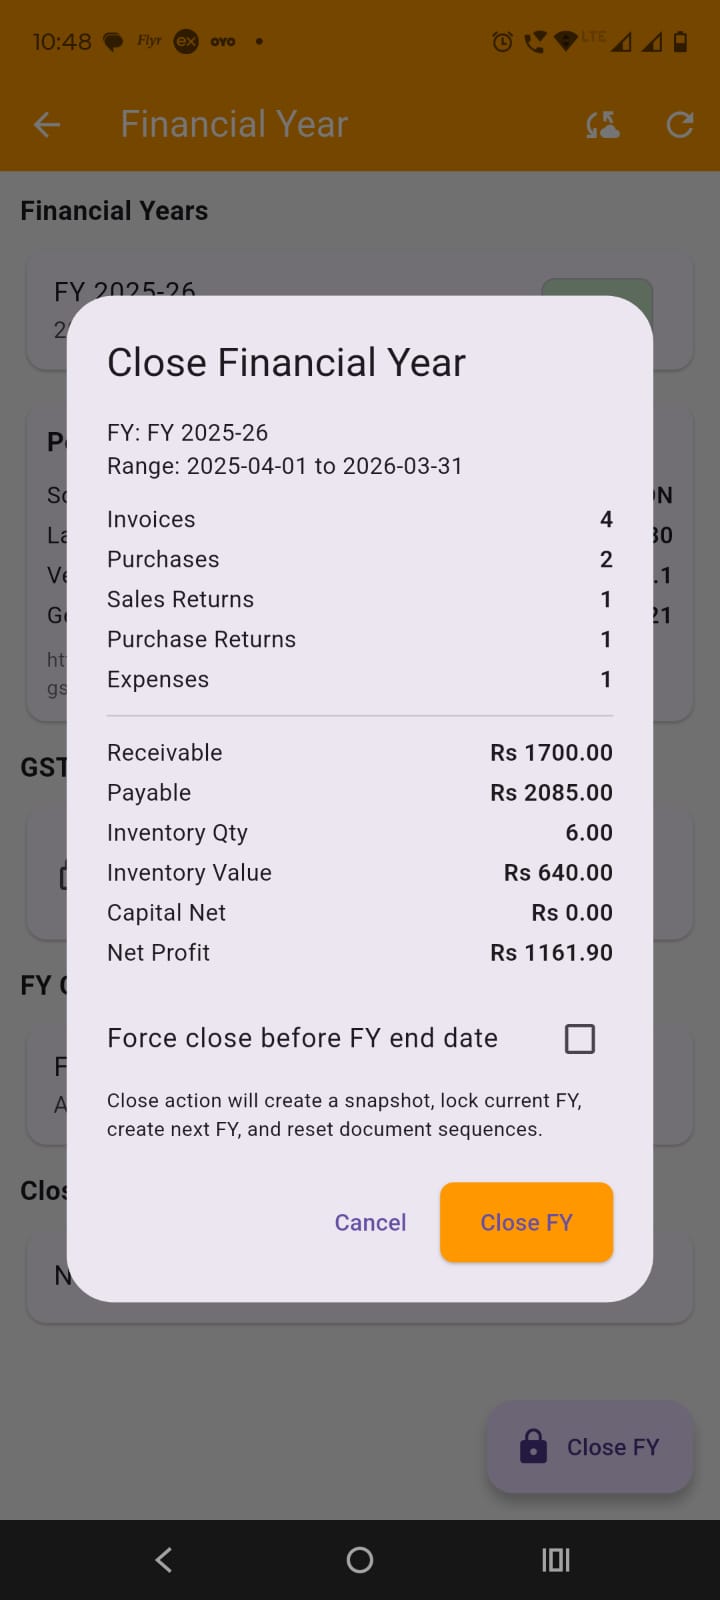
Enter admin approval: The app asks for admin verification before allowing financial year close.
Review the close preview: Before closing, the app shows a summary of the current financial year, including:
Use force close only if needed: There is a checkbox for Force close before FY end date. Use it only when you intentionally want to close the year before its actual ending date.
Confirm closing: Tap Close FY in the confirmation dialog.
Understand what the app does: When financial year closing is completed, the app:
Read the success message: After closing, the app shows a message confirming:
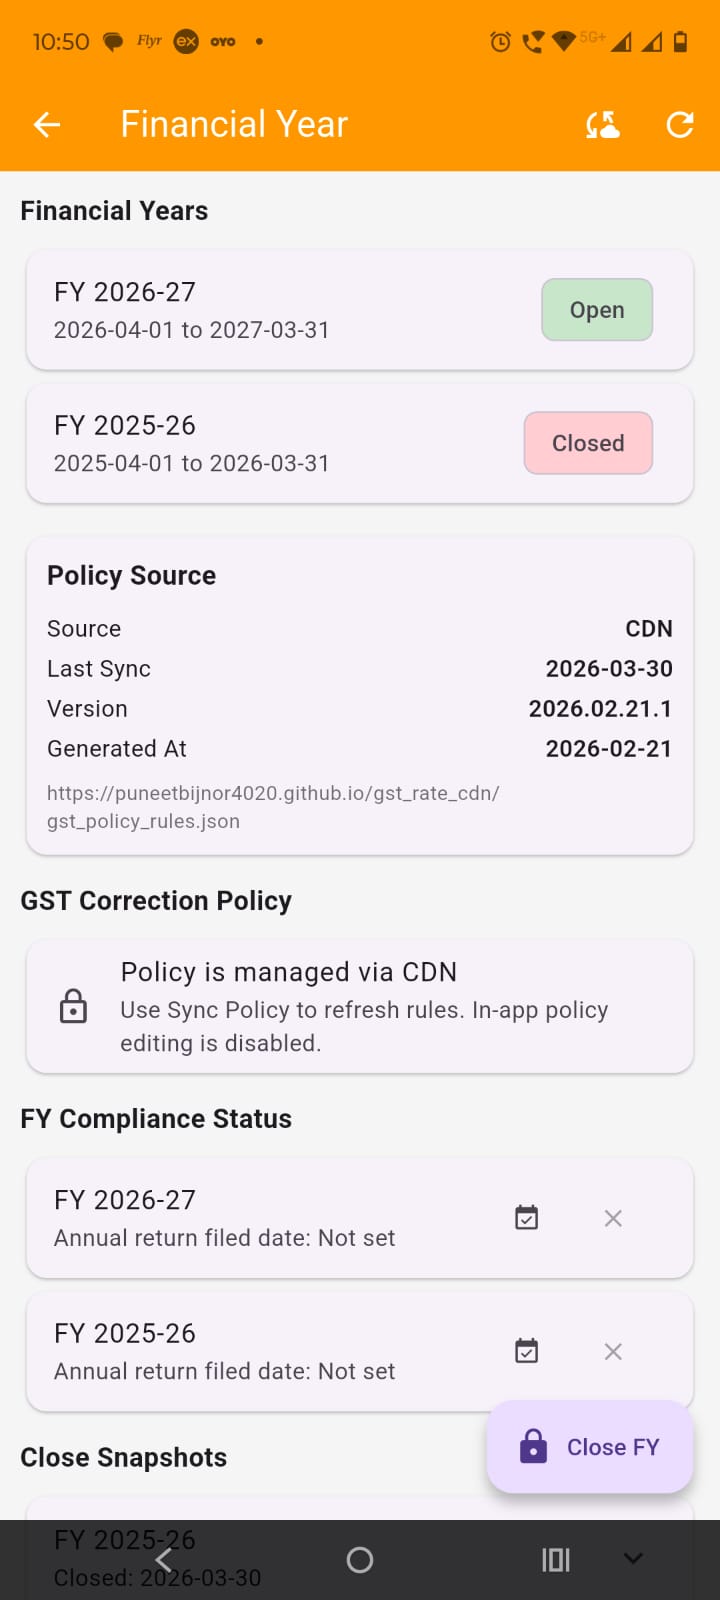
Scroll down to Close Snapshots. Each snapshot row shows the financial year label and closed date. Tap a snapshot card to expand it.

The snapshot shows:
These snapshot values help the owner review the year-end position after FY closing.
Scroll to FY Compliance Status. Each financial year row shows whether annual return filed date is set or not.

Set the filed date : Tap the calendar-style action icon to set the annual return filed date for that financial year.

Clear the filed date if needed: Tap the clear icon to remove the filed date.
Admin approval is required: Both setting and clearing the filed date require admin verification (admin password.
The screen shows a section named GST Correction Policy. Policy is not edited directly on this screen. It is managed through CDN and synced into the app.

Use Sync Policy: Tap the cloud sync icon in the app bar to refresh policy data.
Review policy source details: In the Policy Source card, the app shows:
Use this for verification: This section helps confirm that the app is using the latest synced GST correction policy.
This screen does not provide a separate Add Financial Year option. The next financial year is created automatically when the current financial year is closed.
Keep the current year correct: Before closing a year, make sure transactions, balances, and reports are checked properly.
Close carefully: Closing a financial year is an important operation because it affects year status, snapshots, and the next active year.